Guide
How to do a pre-trip inspection
A pre-trip inspection is the check you do before you drive, to make sure the truck is safe.
This guide is for drivers who already have a routine. It starts with what the rules require and the checks that are easy to miss, then goes through the CDL manual's full inspection step by step, with the DVIR boxes each step covers.
In short
- Why do one?
- Before you drive, the rules say you must be satisfied the truck is safe, including 11 parts they name: brakes, steering, lights, tires and the rest.
- How do I do it?
- The same seven steps every time: look the truck over, check under the hood, start it and check the cab, set up the lights, walk around, check the signals, and test the brakes.
- What if I find a defect?
- Don't drive the truck until it's fixed. Tell your company, and write it up.
- Which trucks does this cover?
- Trucks with hydraulic brakes and no trailer, like most box trucks. Air brakes and trailers aren't covered yet.
Before you drive
Two federal rules apply before every trip:
- You must “be satisfied that the motor vehicle is in safe operating condition,” and review the last DVIR if one was required.
- You can't drive until you're satisfied that 11 parts and accessories are “in good working order”: service brakes, parking brake, steering, lights and reflectors, tires, horn, wipers, mirrors, coupling devices, wheels and rims, and emergency equipment.
Those are the same 11 items every DVIR covers. How to fill out a DVIR shows which box each one goes in.
A pre-trip inspection is how you get there. Doing it in the same order every time is what keeps you from skipping something.
This guide covers trucks with hydraulic brakes and no trailer, like most box trucks. Air brakes and trailers add more checks, and aren't covered yet.
Source: 49 CFR 396.13 and 392.7(a)
Easy to miss
If you already have a routine, make sure it covers these. Each one is quick, easy to skip, and required.
- The parking brake. Set it, put the truck in a low gear and pull forward gently: it should hold the truck. (Step 7)
- Tire pressure and front tread. Kicking a tire only finds a flat, so use a gauge. A penny shows 2/32 inch of tread, which is only enough for the rear tires: front tires need 4/32 inch. (Step 5)
- Lug nuts. Look for missing nuts on every wheel, and for rust streaks running from a nut, which can mean it's loose. (Step 5)
- Steering free play. More than about 2 inches at the rim of a 20-inch wheel is too much. (Step 3)
- Emergency equipment. A charged fire extinguisher, three reflective warning triangles, and spare fuses unless the truck uses circuit breakers. (Step 3)
- The lights you can't see from the seat. Brake lights, clearance and marker lights, and the reflectors. (Step 5, step 6)
- The last DVIR. If it listed defects, check the repairs were certified, and sign it before you drive. (Step 1)
The seven steps
The steps follow the seven-step method in section 2 of the CDL manual (Oregon's online edition is linked under Sources), in our own words. Under each step, the boxes it covers open to the same notes as the ? buttons on the form.
1 Look the truck over
Walk up to the truck and take it in as a whole. Is it leaning to one side, or damaged? Look underneath for fresh drips of oil, coolant, grease or fuel, and around it for anything in your way: people, other vehicles, low wires or branches.
Then read the last DVIR. If it listed defects, check that they were certified as repaired or not needing repair, and sign it. How to fill out a DVIR covers that line.
2 Check under the hood
Make sure the parking brake is on, or the wheels are chocked, before you open the hood (or tilt the cab).
Check the fluid levels: engine oil, coolant, power steering fluid, washer fluid, brake fluid and, if the truck has a dipstick for it, automatic transmission fluid. Look over the belts, hoses and wiring, and look for leaks anywhere in the engine bay. Then close the hood and make sure it latches.
The power steering, washer and brake fluid checks are in the Steering, Windshield Wipers and Brakes notes, under steps 3 and 7.
On the DVIR
Engine
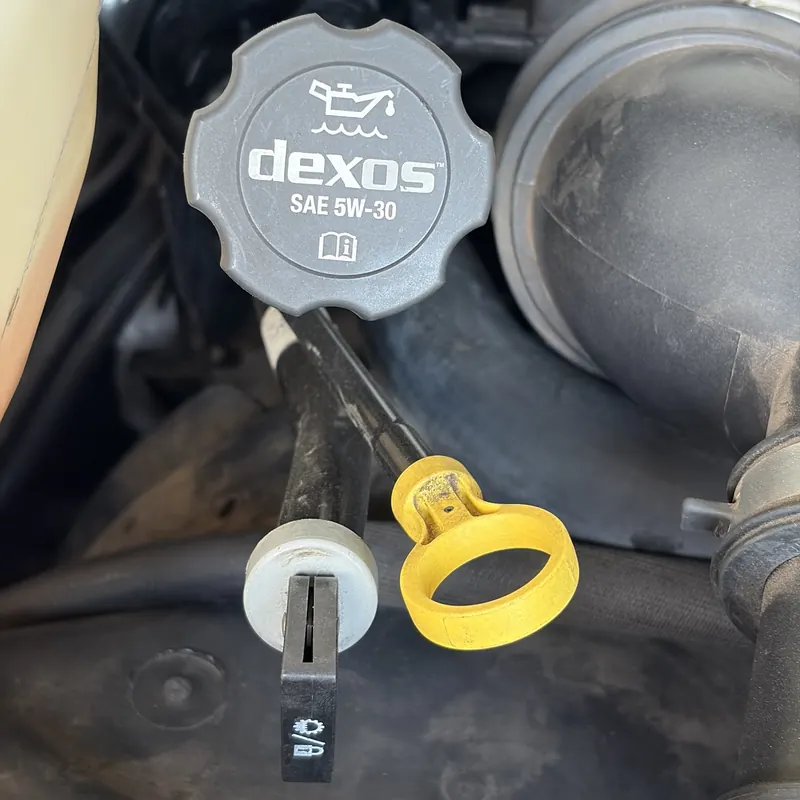
Where it is: Under the hood, or under the cab on cab-over trucks.
Check that:
- The oil on the dipstick is between the marks.
- No fresh leaks of oil, coolant or fuel, on the engine or on the ground under it.
- The belts are tight, and not cracked or frayed.
- The wiring isn't cracked, worn through or hanging loose.
- The hood (or cab) closes and latches.
Example remark: “Engine: oil leaking at front of engine, fresh drips on the ground.”
Source: CDL manual, section 2
Radiator
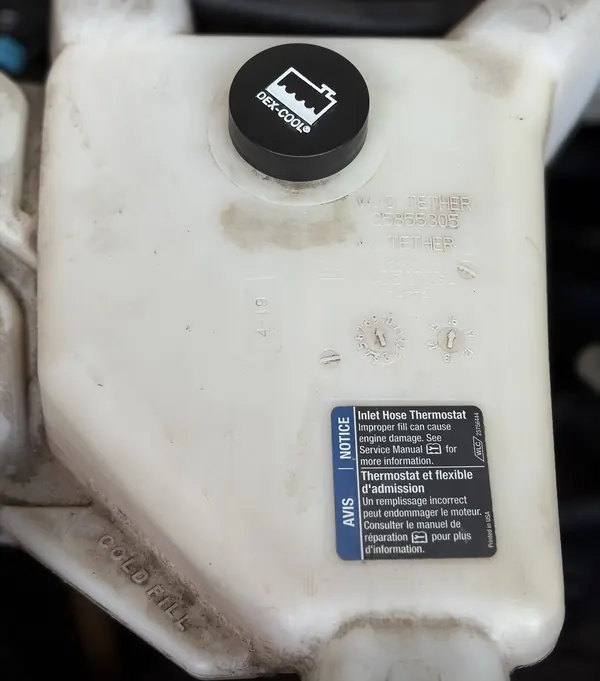
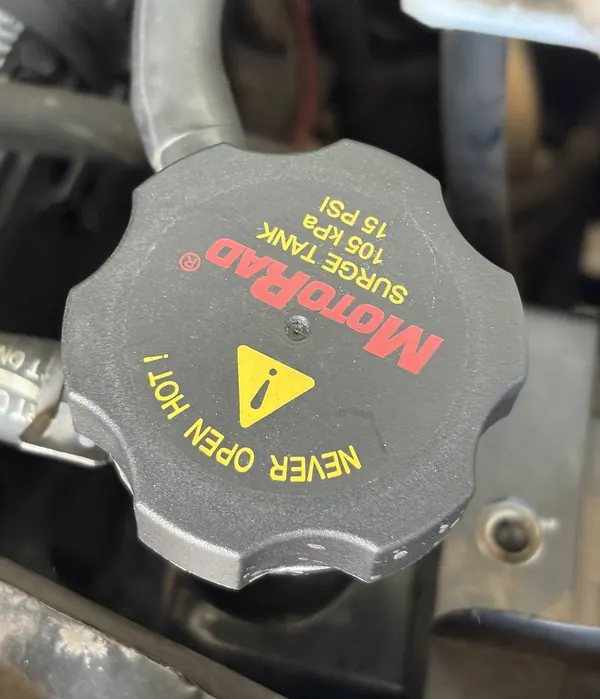
Where it is: At the front of the engine, behind the grille. Most trucks also have a see-through coolant tank nearby, with level marks.
Check that:
- The coolant in the tank is at the right level (check it with the engine cold).
- The radiator and hoses aren't leaking, cracked or swollen.
- After you start the engine, the coolant warning light goes out and the temperature gauge rises slowly to normal.
Never open the radiator cap on a hot engine: the coolant is under pressure and can burn you.
Example remark: “Radiator: coolant dripping from lower hose, tank below MIN.”
Source: CDL manual, section 2
Battery
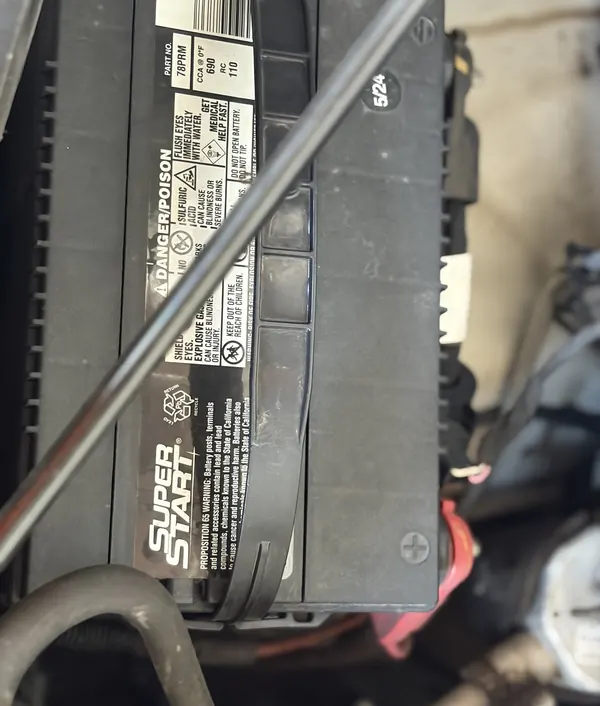
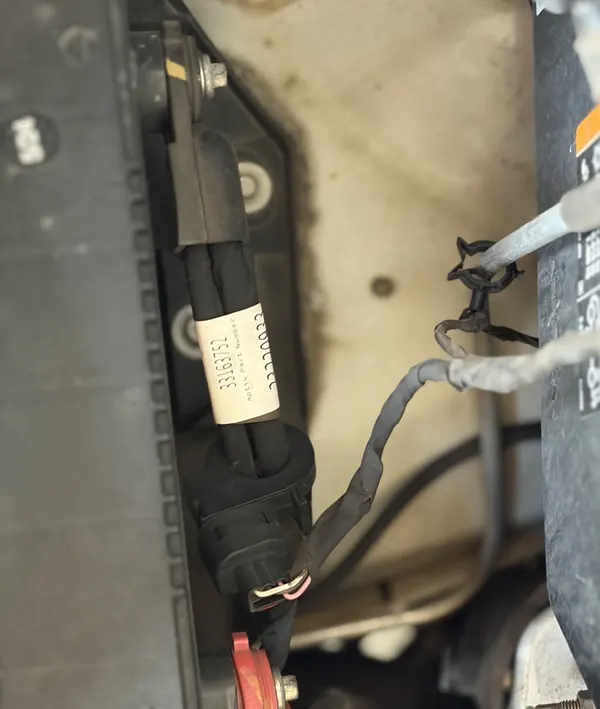
Where it is: Under the hood on most trucks. Some keep it in a box on the frame, under the cab or behind a step.
Check that:
- It sits tight in its tray or box, with the hold-down in place and the box cover on.
- The case isn't cracked or leaking.
- The cable ends are tight and free of heavy white or green corrosion.
- If it has removable caps: the fluid is at the right level and every cap is in place.
- Once the engine runs, the charging light goes out and the voltmeter, if there is one, reads normal.
Example remark: “Battery: hold-down missing, battery slides in its tray.”
Source: CDL manual, section 2
Transmission
Where it is: Behind the engine, under the truck. On many automatics the fluid dipstick is at the back of the engine bay.
Check that:
- On an automatic, the fluid is at the right level. Many are checked warm with the engine running, and some trucks have no dipstick: the owner's manual says how.
- No fluid is leaking from the transmission or its lines.
- It goes into every gear without slipping, grinding or a long delay.
Example remark: “Transmission: slips going into 2nd, fluid leaking at the pan.”
Source: CDL manual, section 2
3 Start the engine and check the cab
With the parking brake on and the gearshift in neutral (or park), start the engine and listen for anything unusual.
Watch the gauges and warning lights settle: the oil pressure comes up to normal within seconds, the voltmeter reads normal, the coolant temperature starts rising slowly, and the warning lights, ABS included, go out.
Then go through the controls for anything loose, sticking or damaged: the steering wheel, pedals, gearshift, parking brake, horn, wipers and washer, heater and defroster, and the light switches. Check that the mirrors and windshield are clean, not cracked and clear of anything that blocks your view, that the emergency equipment is on board, and that your seat belt latches.
On the DVIR
Starter
Where it is: On the engine. You test it with the key or start button.
Check that:
- The engine cranks and starts normally.
- There is no grinding, and no single click without cranking.
Slow cranking can be the starter or the battery, so describe what happened in Remarks.
Example remark: “Starter: grinding noise when cranking, took 3 tries.”
Oil Pressure
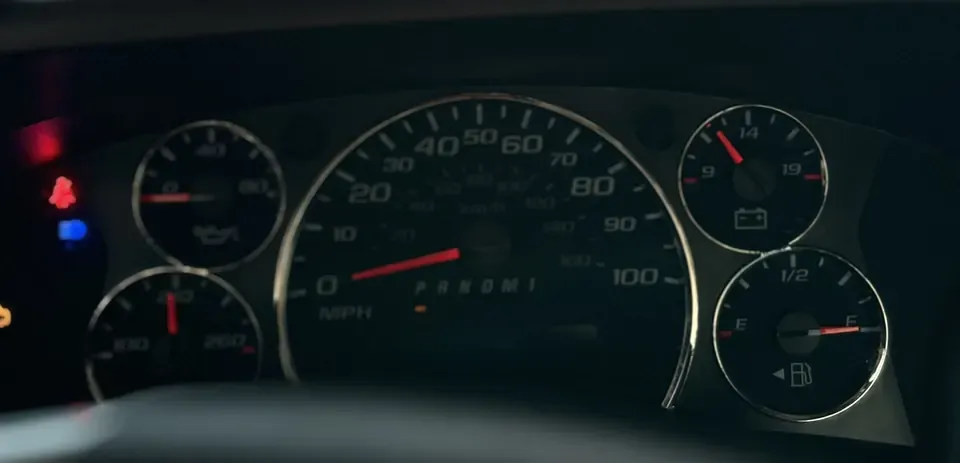
Where it is: The oil pressure gauge or oil warning light on the dash.
Check that:
- After you start the engine, the gauge comes up to normal within seconds, or the warning light goes out.
- It stays in the normal range at idle and while driving.
If it stays low or the light stays on, shut the engine off and check the oil level before you go anywhere.
Example remark: “Oil pressure: gauge low at idle, light flickers.”
Source: CDL manual, section 2
Steering
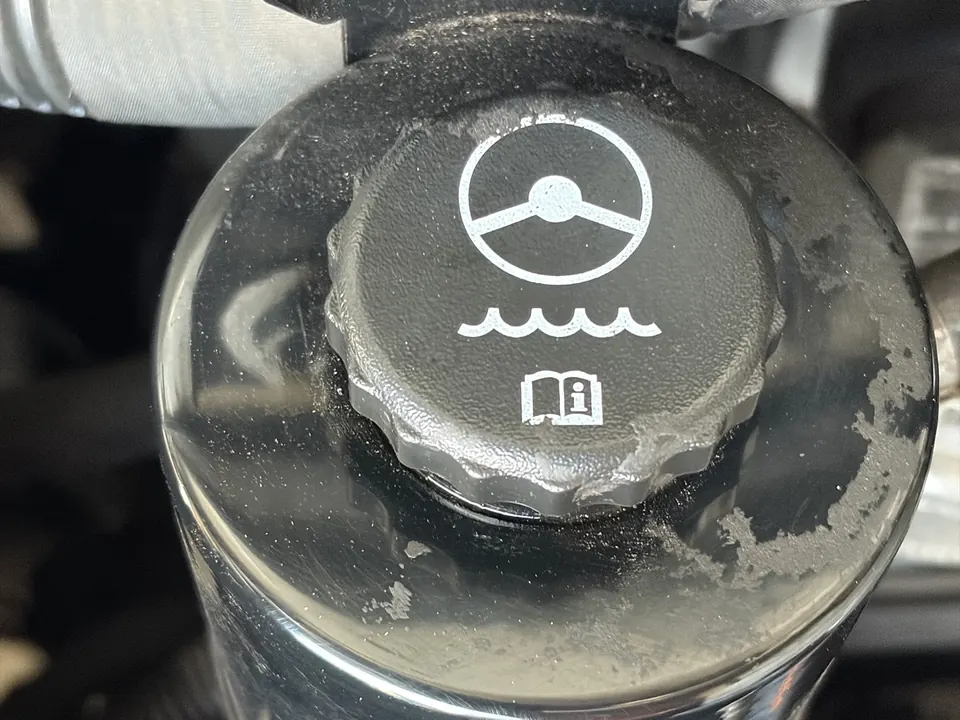
Where it is: The steering wheel in the cab, the power steering reservoir under the hood (its cap often shows a steering wheel), and the steering parts behind the front wheels.
Check that:
- Free play is small. With the engine running and the wheels straight, turn the wheel until the left front tire just moves, then back the other way. More than about 2 inches at the rim of a 20-inch wheel is too much.
- The power steering fluid is at the right level, with no leaks at the pump or hoses.
- No groaning, binding or shaking as you turn the wheel all the way each way.
- Nothing is loose, bent or missing behind the front wheels.
Example remark: “Steering: about 3 inches of free play at the wheel.”
Source: CDL manual, section 2
Clutch
Only on trucks with a manual transmission (a clutch pedal). On an automatic, leave this unticked.
Where it is: The pedal to the left of the brake.
Check that:
- The pedal moves freely and comes back up on its own.
- The clutch engages smoothly, without slipping, grabbing or shuddering.
- Every gear goes in without grinding.
Example remark: “Clutch: slips under load, engine revs but truck barely speeds up.”
Source: CDL manual, section 2
Horn
Where it is: Usually the center of the steering wheel.
Check that:
- It sounds loud and clear every time you press it.
Example remark: “Horn: does not sound.”
Source: 49 CFR 393.81
Windshield Wipers
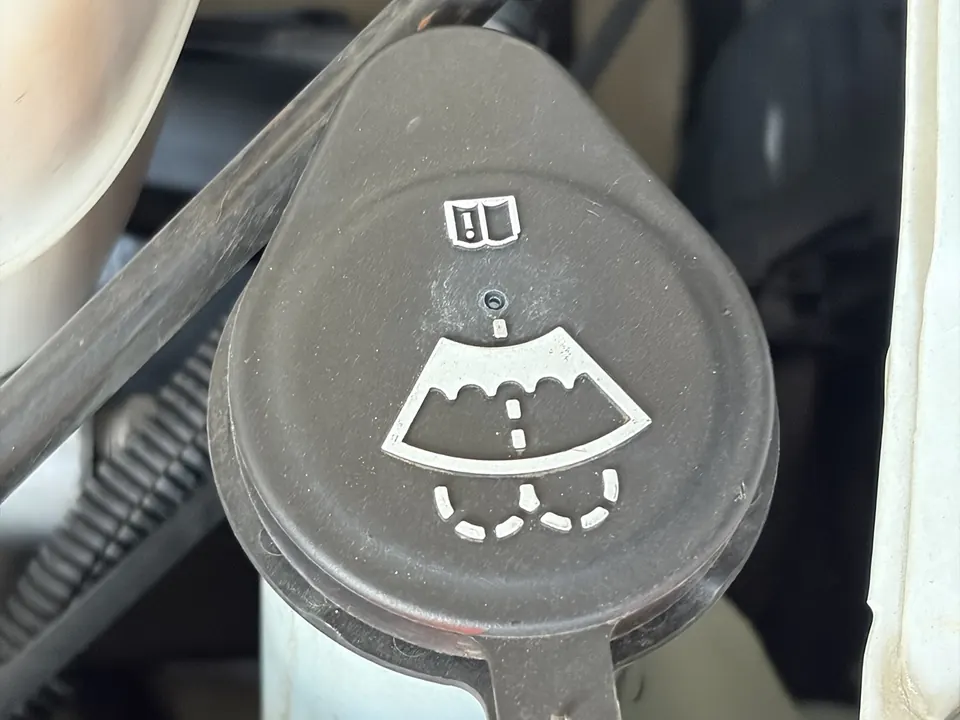
Where it is: At the bottom of the windshield. The washer fluid tank is under the hood, and its cap usually shows a windshield symbol.
Check that:
- The wipers work at every speed and clear the glass without streaks.
- The blades aren't torn, cracked or stiff, and the arms press them firmly against the glass.
- The washer sprays onto the windshield, and the tank has fluid.
Example remark: “Wipers: driver-side blade torn, leaves streaks.”
Source: CDL manual, section 2; 49 CFR 393.78
Defroster
Where it is: The vents along the bottom of the windshield, run from the heater and fan controls.
Check that:
- On the defrost setting, air blows out of the windshield vents at every fan speed.
- It clears fog and frost from the inside of the windshield.
Example remark: “Defroster: no air from the windshield vents.”
Source: 49 CFR 393.79
Heater
Where it is: The heater and fan controls on the dash.
Check that:
- Warm air comes out once the engine has warmed up, and the fan works.
- No sweet smell, fogged-up windows or wet floor under the dash. Those mean coolant is leaking from the heater.
- No exhaust fumes or burning smell from the vents.
Example remark: “Heater: no heat, sweet smell and wet carpet under the dash.”
Mirrors
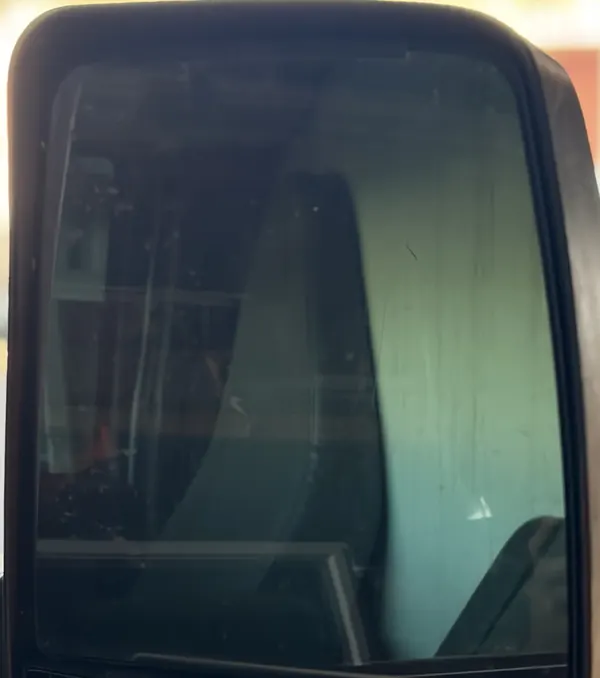
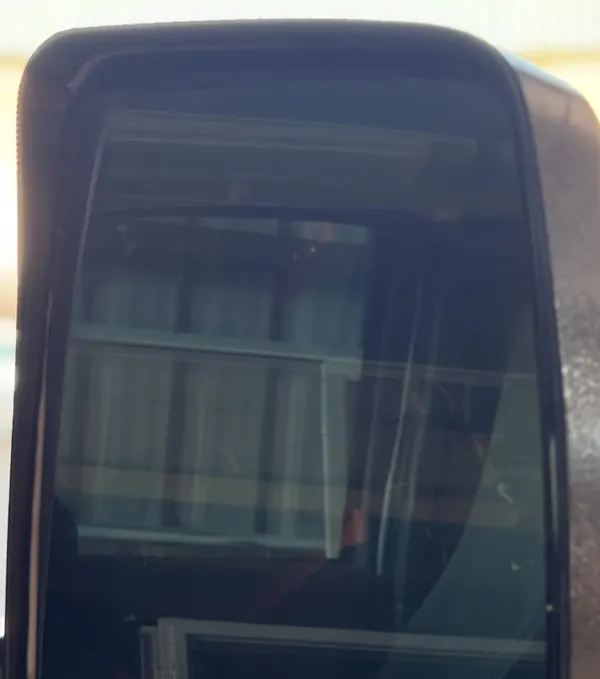
Where it is: Outside the driver and passenger doors, plus any extra convex or hood mirrors.
Check that:
- There's one on each side, firmly mounted, not cracked and not loose.
- They're clean, and adjusted so you can see along both sides of the truck to the rear.
Example remark: “Mirrors: passenger-side mirror loose, vibrates at speed.”
Source: CDL manual, section 2; 49 CFR 393.80
Windows
Where it is: The windshield and the cab's side and rear windows.
Check that:
- On the windshield above the top of the steering wheel, no two cracks cross, and no chip is bigger than a penny (3/4 inch) or closer than 3 inches to another.
- The glass is clean, with no stickers or objects blocking your view.
- The side windows aren't cracked, and they open and close.
Example remark: “Windows: two cracks crossing on driver's side of windshield.”
Source: CDL manual, section 2; 49 CFR 393.60
Safety Equipment
Where it is: In the cab, often behind or under a seat.
Check that:
- The fire extinguisher is charged (gauge needle in the green), rated 5 B:C or higher, mounted securely and easy to reach.
- Three reflective warning triangles are on board.
- There are spare fuses, unless the truck uses circuit breakers.
- The seat belt is mounted securely, latches, and isn't ripped or frayed.
Example remark: “Safety equipment: fire extinguisher gauge in the red.”
Source: CDL manual, section 2; 49 CFR 393.95
On-Board Recorder
Only if the truck has an electronic logging device (ELD) for your hours of service.
Where it is: The ELD unit and its screen or tablet in the cab.
Check that:
- It powers on, connects, and shows no malfunction warning.
If it malfunctions, tick this box, tell your company in writing within 24 hours, and keep paper logs until it's fixed. If the ELD can't show today's and the past 7 days' logs, rebuild those on paper too.
Example remark: “On-board recorder: ELD shows a malfunction, not recording.”
Source: 49 CFR 395.34
Carburetor
Most trucks today have fuel injection instead of a carburetor. If yours does, leave this unticked.
Check that:
- The engine idles smoothly, with no fuel leaking and no fuel smell.
Example remark: “Carburetor: engine stalls at idle, fuel smell.”
Tachograph
A tachograph records speed and driving time, often on a paper disc. Most trucks today don't have one, and your hours go on the ELD (the On-Board Recorder box). If yours doesn't have one, leave this unticked.
Check that:
- It runs and records, with a fresh disc or chart in place.
Example remark: “Tachograph: not recording, disc not turning.”
4 Engine off, lights on
Set the parking brake, turn the engine off and take the key with you. Turn on the low beams and the four-way flashers, and get out.
5 Walk around the truck
At the front, check that the low beams and both front flashers work, then switch to high beams and check those. Turn off the headlights and flashers, turn on the clearance and marker lights and the right turn signal, and start walking.
Go around in the same order every time: left front, front, right side, right rear, back, left side. Wipe the lights, reflectors and glass as you go.
- At each wheel: the tire, the wheel and its lug nuts, the springs and shocks, and the brake hoses behind it.
- At the front: the axle, the steering parts (grab them and feel for looseness), the windshield and wiper arms, the lights, and the amber reflectors.
- Along each side: the fuel tank, the exhaust, the frame, the drive shaft and the wiring, plus the battery box if it's mounted outside.
- At the back: the tail, brake, turn and clearance lights, the red reflectors, the license plate, the mud flaps, and the cargo door: closed and latched, with the load secured.
On the DVIR
Lights
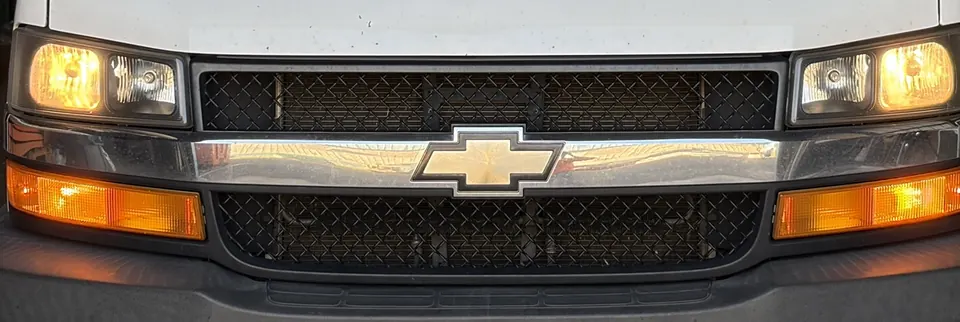
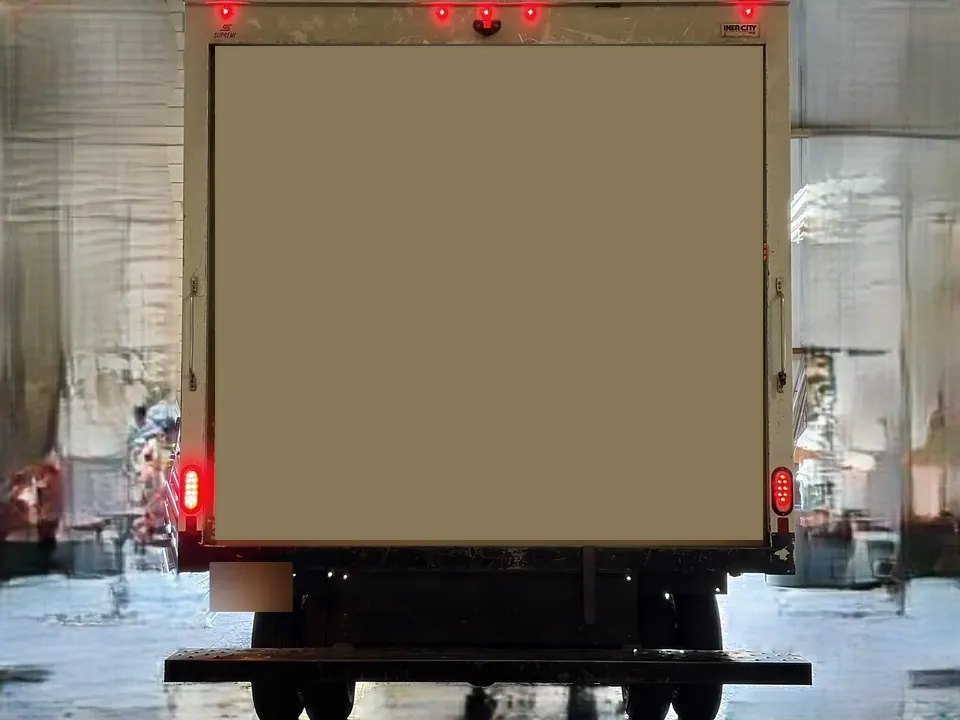
Where it is: All around the truck: headlights and turn signals at the front, marker lights along the sides, and tail, brake and turn signals at the back.
Check that:
- Every light works: low and high beams, turn signals and four-way flashers front and back, tail lights, brake lights, marker lights and the license plate light.
- On a truck 80 inches wide or more, as most box trucks are, the clearance lights at the corners and the identification lights work too.
- The lenses are clean, not cracked or missing, and the right color: white headlights, amber at the front and sides, red at the back (rear turn signals can be red or amber).
To check the brake lights on your own, press the pedal and watch their reflection on a wall or vehicle behind you, or ask someone to watch.
Example remark: “Lights: left rear brake light out.”
Source: CDL manual, section 2; 49 CFR 393.11
Reflectors
Where it is: At the back of the truck, along its sides and at the front corners.
Check that:
- Every reflector is there, clean, and not cracked or broken.
- The colors are right: red at the back and at the rear of each side, amber elsewhere on the sides and at the front.
Example remark: “Reflectors: right rear reflector missing.”
Source: CDL manual, section 2; 49 CFR 393.11
Tires
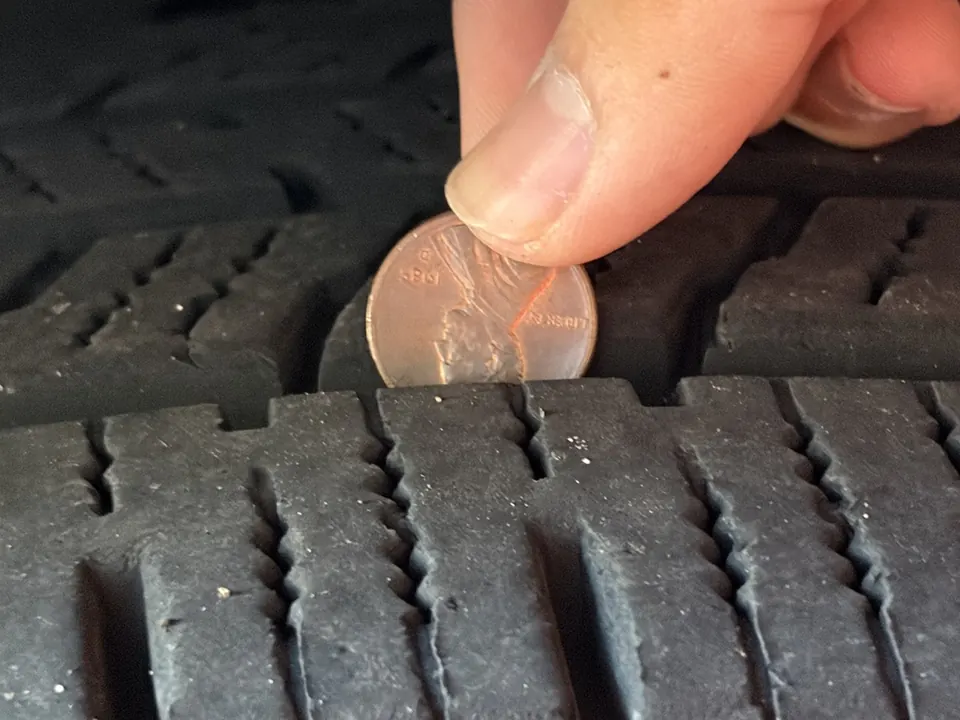
Where it is: Every tire, including the inside tire of each pair of duals.
Check that:
- The pressure matches the sticker in the driver's door jamb. Check it with a gauge while the tires are cold: kicking a tire only finds a flat.
- The tread is at least 4/32 inch deep in every major groove on the front tires, and 2/32 inch on the others.
- There are no cuts or bulges, no fabric or cords showing in the tread or sidewall, and no tread coming apart.
- The valve stems aren't cut or cracked.
- Duals don't touch each other, and nothing is stuck between them.
- Tires on the same axle match in size, and radial and bias-ply tires aren't mixed.
A quick tread check: put a quarter upside down in a groove. If you can see the top of Washington's head, the tread is under 4/32 inch. A penny does the same for 2/32 inch with Lincoln's head. A tread depth gauge is more exact.
Example remark: “Tires: left front sidewall bulge.”
Source: CDL manual, section 2; 49 CFR 393.75
Wheels
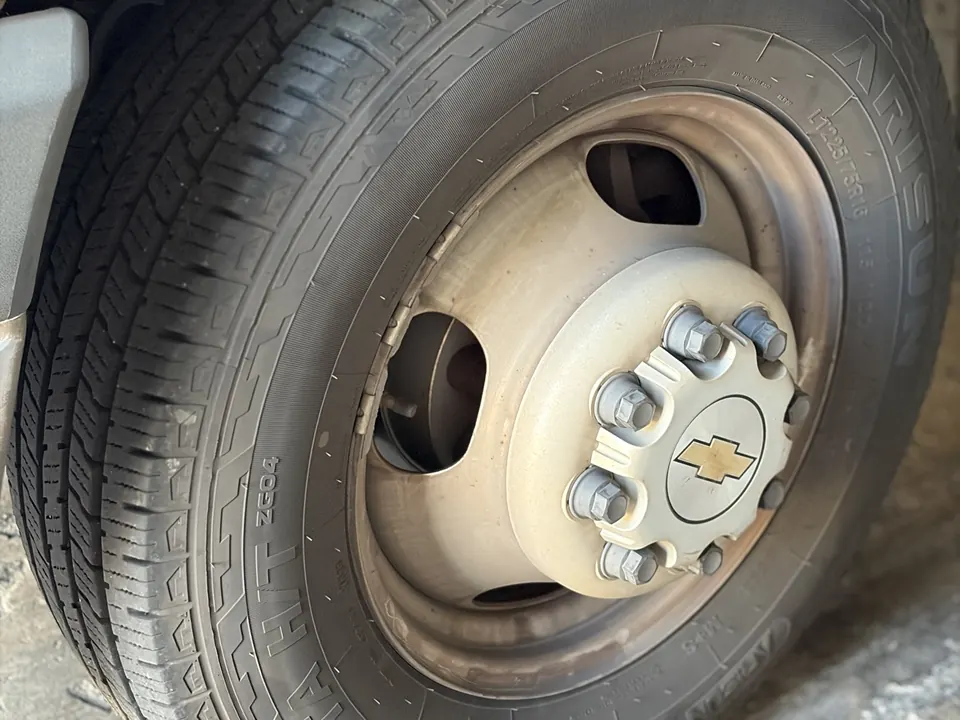
Where it is: Every wheel, including the inner wheel of each pair of duals, and the hub at its center.
Check that:
- No lug nut or stud is missing, broken or loose. Rust streaks running from a nut can mean it's loose.
- The wheel and rim aren't cracked or bent, the stud holes aren't worn oval, and there are no welding repairs.
- The hub and wheel seals aren't leaking, and the hub oil is at the right level if the hub has a sight window.
After a tire change, stop a short while later and check that the lug nuts are still tight.
Example remark: “Wheels: two lug nuts missing, right rear outer wheel.”
Source: CDL manual, section 2; 49 CFR 393.205
Springs
Where it is: Above each axle, under the frame: leaf springs on most trucks, with shock absorbers beside them. Some trucks have air bags instead.
Check that:
- No spring leaf is cracked, broken, missing or shifted out of place, where it could hit a tire.
- The spring hangers and U-bolts aren't cracked, loose or missing.
- The shock absorbers aren't leaking or broken.
- The truck sits level, not leaning to one side.
- If it has air suspension, it isn't damaged or leaking.
Example remark: “Springs: broken leaf in left rear spring.”
Source: CDL manual, section 2; 49 CFR 393.207
Front Axle
Where it is: Under the front of the truck, between the front wheels.
Check that:
- The axle isn't cracked or bent.
- The parts that hold it in place, such as U-bolts and spring hangers, aren't loose, cracked or missing.
Example remark: “Front axle: U-bolt nut missing on left side.”
Source: CDL manual, section 2; 49 CFR 393.207
Fuel Tanks
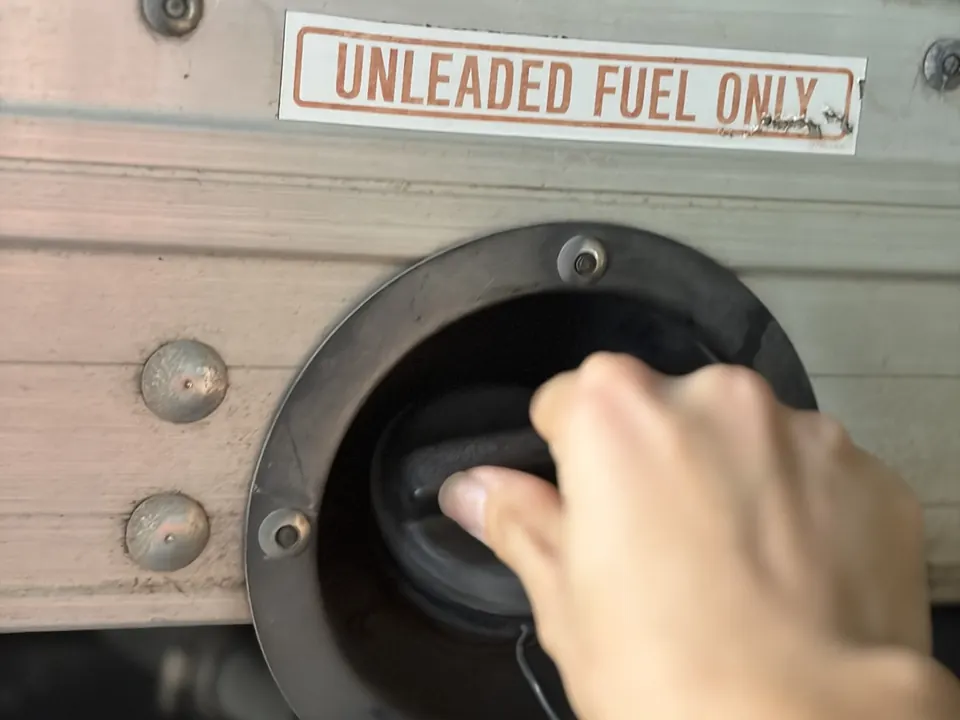
Where it is: Under the truck or on the frame rails, usually behind the cab.
Check that:
- Each tank is mounted securely, with its straps tight.
- It isn't dented, damaged or leaking, and there's no fuel smell.
- The cap is on and tight.
- The fuel lines aren't leaking or rubbing on anything.
Also make sure there's enough fuel for the trip.
Example remark: “Fuel tank: mounting strap loose, fuel smell at the cap.”
Source: CDL manual, section 2; 49 CFR 393.65
Muffler
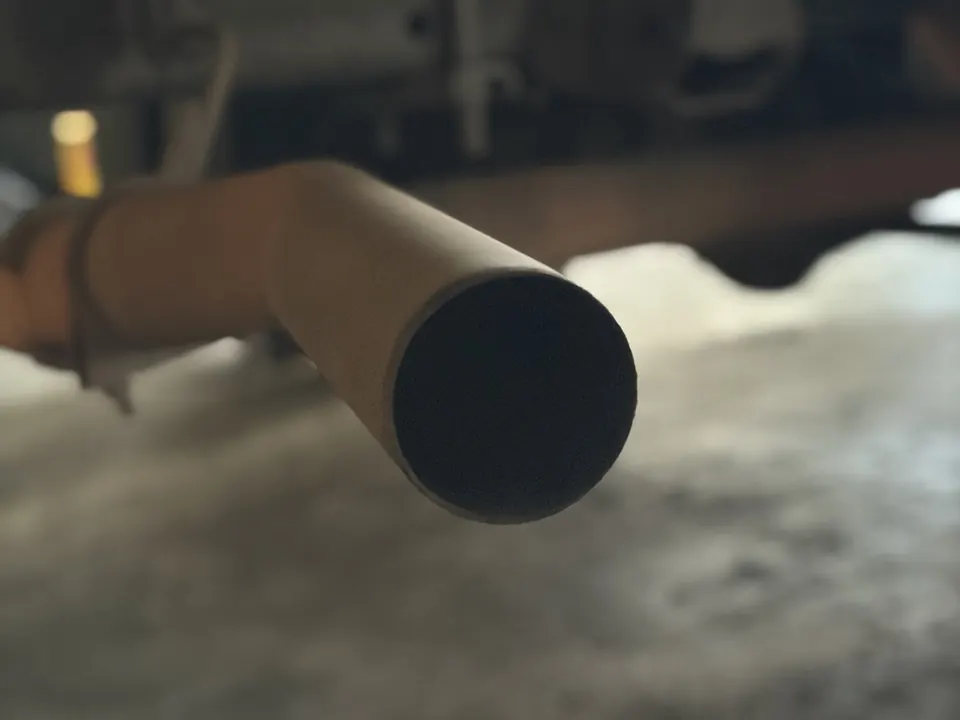
Where it is: Under the truck: the exhaust pipes, muffler and tailpipe, or a stack behind the cab.
Check that:
- The pipes, muffler and tailpipe are mounted securely, and none is cracked, broken or missing.
- Nothing leaks: no black soot around the joints, no unusually loud exhaust and no exhaust smell in the cab.
- No part of the exhaust touches fuel lines, wiring, tires or other moving parts.
- There are no wrap or patch repairs. They aren't allowed, even as a temporary fix.
Example remark: “Muffler: exhaust leaking at the muffler inlet, black soot, loud.”
Source: CDL manual, section 2; 49 CFR 393.83
Drive Line
Where it is: Under the truck: the drive shaft running from the transmission back to the rear axle.
Check that:
- The drive shaft isn't bent, cracked or dented.
- The U-joints and couplings are secure, with nothing wrapped around them, such as wire or plastic.
- There is no clunk or shudder from under the truck when you pull away or shift.
Example remark: “Drive line: rear U-joint has play, clunks when pulling away.”
Source: CDL manual, section 11 (vehicle inspection test)
Rear End
Where it is: The rear axle under the back of the truck, with the differential: the round housing in the middle.
Check that:
- No gear oil is leaking from the differential or the axle seals. Look for oil on the inside of the rear wheels too.
- The axle is secure, and the parts that hold it in place aren't loose, cracked or missing.
- There is no clunking, whining or grinding from the rear when you drive or turn.
Example remark: “Rear end: gear oil leaking at the differential.”
Source: CDL manual, section 2
Other
Where it is: Anything on the truck that has no box of its own.
Check that:
- The cab doors open, close and latch, and the steps and handholds are secure.
- The frame and cross members aren't bent or cracked.
- The mud flaps are there, fastened, and not dragging or rubbing a tire.
- The license plate is there, clean and secure.
- On a box truck, the cargo door latches, and the load is blocked, braced or tied down.
Tick Other and name the part in Remarks.
Example remark: “Other: cargo door latch broken, door won't stay shut.”
Source: CDL manual, section 2
6 Check the signal and brake lights
Get back in, turn off all the lights, then turn on the left turn signal. Get out and check the left turn signals, front and back. For the brake lights, have someone press the pedal, or press it yourself and watch their reflection on a wall or vehicle behind you.
Back in the cab, turn off the lights you don't need, make sure the paperwork you need is on board, and stow anything loose so it can't slide under a pedal. Then start the engine.
7 Test the brakes
Pump the brake pedal three times, then press it firmly and hold for five seconds. The pedal shouldn't move. If it sinks, there may be a leak: get it fixed before you drive.
Fasten your seat belt. With the parking brake set, put the truck in a low gear and pull forward gently: the parking brake should hold it. Then drive forward at about 5 mph and brake firmly. The truck should stop straight, without pulling to one side, and the pedal should feel normal.
Trucks with air brakes have their own checks, in the manual's air brakes sections. This guide doesn't cover them yet.
On the DVIR
Brakes
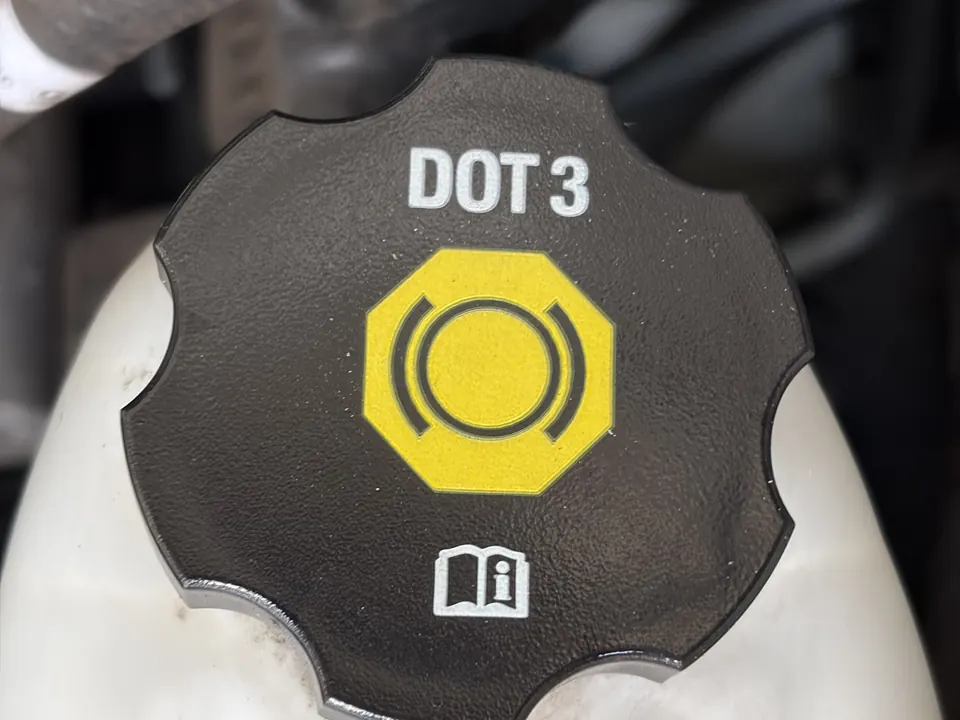
Where it is: The pedal and parking brake in the cab, the brake fluid reservoir (usually at the back of the engine bay on the driver's side), and the brakes behind each wheel.
Check that:
- The brake fluid is between the reservoir's MIN and MAX marks.
- Engine running, pump the pedal 3 times, then press firmly for 5 seconds: the pedal doesn't sink.
- Parking brake set, truck in gear, pull forward gently: the parking brake holds.
- At about 5 mph, brake firmly: the truck stops straight, with no pulling and no soft pedal.
- The ABS light goes out right after starting, and the red brake light goes out when you release the parking brake.
- No fluid is leaking at the wheels or from the brake lines.
Example remark: “Brakes: pedal slowly sinks during the 5-second hold.”
Source: CDL manual, section 2
How one box-truck driver does it
The driver who built pretriq drives a gasoline Chevy box truck with hydraulic brakes and no trailer. This is that driver's own routine, word for word. It's shorter than the manual's inspection, so where the manual or the rules ask for more, a note says so.
Start outside the vehicle:
-
Wipe both driver & passenger side mirrors with microfiber cloth & ammonia-free glass cleaner spray
-
Kick all 4 tires to check for air pressure (daily) & check tire tread (using a US coin). Visually inspect for punctures. When kicking the tires, my boot should bounce off the rubber. If my boot sinks into the tire, it must be filled up with air. For the tire tread, I believe the saying is: "Use a penny and if the tire tread covers Lincoln's hat, then you're okay"
Note: A kick finds a flat tire, not low pressure, so check the pressure with a gauge against the sticker in the driver's door jamb while the tires are cold. The penny test goes by the top of Lincoln's head (there's no hat on a penny) and shows 2/32 inch of tread: enough for the rear tires only. Front tires need 4/32 inch, so use a quarter (Washington's head) or a tread depth gauge. More under Tires, in step 5.
-
I tighten the gas cap
-
I look underneath the vehicle for fractures in the metal/frame. Debris that are wrapped underneath. Check safety tag expiration (might be Hawaii only)
Note: Not just Hawaii. Every commercial motor vehicle needs an inspection at least once every 12 months, with proof on the vehicle, such as a sticker or decal (49 CFR 396.17). Your state may have its own inspection too.
-
Inspect doors/floor. I open driver/passenger door and remove and debri/obstruction on the steps of the door or floor
-
Check lights - left+right signal/blinker front & back, left+right hazard front & back, high beams, automatic/manual on/off light switch
-
Use windshield wiper/fluid to increase visibility on front windshield
-
Step on the brakes and observe brake lights through side mirrors (vehicle off)
-
Tap horn once or twice
-
Open hood
-
Check all fluid levels - windshield wiper, brake fluid(/transmission fluid?), oil level/consistency/color, power steering fluid, check battery terminal for corrosion, check belt for cracks/damage
Note: Brake fluid and transmission fluid are separate. The brake fluid reservoir is usually at the back of the engine bay on the driver's side. Many automatic transmissions are checked warm with the engine running, and some trucks have no transmission dipstick: the owner's manual says how. Check the coolant level here too, with the engine cold.
-
Close hood
-
Hop inside vehicle inspect seatbelt
-
Turn vehicle on
-
Fully turn steering wheel to the left and listen for groans
-
Fully turn steering wheel to the right and listen for groans
Note: Check the free play too: with the engine running and the wheels straight, turn the wheel until the left front tire just moves. More than about 2 inches at the rim of a 20-inch wheel is too much.
-
Tap on brakes to feel for response
Note: The manual's brake test goes further. Pump the pedal 3 times, then press firmly for 5 seconds: it shouldn't sink. Then check that the parking brake holds the truck in gear, and brake firmly at about 5 mph to check the truck stops straight. See step 7.
-
Turn vehicle off
Also part of this routine, though the list doesn't say so: a walk-around to check the headlights and tail lights, a look at each wheel for missing lug nuts, and a check that the fire extinguisher, first-aid kit, spare fuses and warning triangles are on board.
What the manual adds: testing the parking brake, looking under the truck for fresh leaks, watching the gauges and warning lights after starting, checking the clearance and marker lights and the reflectors, and making sure the box's door is latched and the load is secure.
If you find a defect
Don't drive a truck that isn't safe. The rule says a vehicle “shall not be operated in such a condition as to likely cause an accident or a breakdown of the vehicle.”
Tell your company before you go, and get it fixed or checked by someone qualified. Write it up the way your company does it, so the repair gets recorded and certified. How to fill out a DVIR shows how.
Source: 49 CFR 396.7(a)
Ready to write it up? Tap Start pretrip on the home page.
Go to the home pageSources
- 49 CFR 392.7, Equipment, inspection and use
- 49 CFR 396.7, Unsafe operations forbidden
- 49 CFR 396.13, Driver inspection
- 49 CFR 396.17, Periodic inspection
- Oregon Commercial Driver Manual, Section 2: Driving Safely (2.1.5, Seven-step Inspection Method)
Each box's note names its own source.
This guide explains the federal rules and the CDL manual's inspection method in plain words. It isn't legal advice, and it doesn't replace your training, your state's CDL manual or your company's policy.